Since the dawn of VR technology, developers have been striving to turn those sci-fi movies into a reality. Although the Quest and Quest 2 headsets are fantastic VR options, they do not come with full body tracking features. This leaves some of us wondering: is it possible at all?
Full body tracking is possible with the Oculus Quest and Quest 2 headsets (currently only in PC VR). The cheapest way to track body movement in VR is by using Kinect. Alternatively, full body tracking can also be achieved with HTC Vive base stations and trackers or using custom tracking solution from Antilatency.
In this article I’m going to be going over each of the different ways you can enhance your VR experience through full body tracking.
Did you hear? Facebook (Meta) is going all-in on virtual reality and the metaverse. Get a Quest 2 headset and be a part of the future of entertainment!
Method #1: Full Body Tracking With Kinect
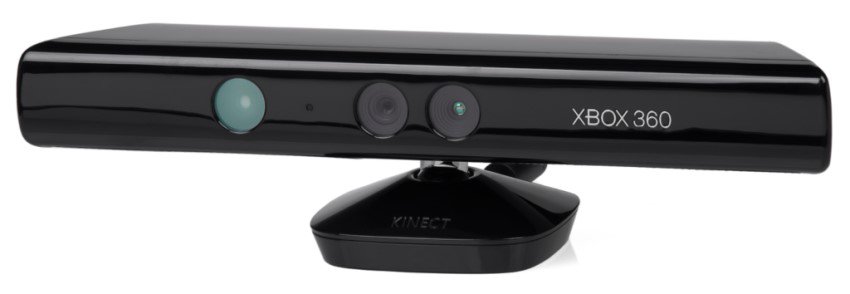
First up is the cheapest and most convenient method I came across: using a Kinect. This method works with the Xbox Kinect 360 and also the Kinect 1. The trusty old Kinect may be outdated for its intended use, but luckily the world we live in is an innovative one!
Let’s take a look at the requirements for this method.
Driver4VR
At the core of this method’s tracking system is the software called “Driver4VR”. This is a Kinect-based tracking software that you’ll need to purchase in order for this method to work.
The retail price is about $28, but they have frequent sales and discounts so do keep an eye out!
The free version only lets you play in 10 minute sessions at a time so I don’t see that being worthwhile for anything except as a free demo.
Kinect
As already mentioned, you will need a Kinect motion tracker for this method to work. I recommend buying a used one from Amazon which often come at really cheap prices.

PC
It is recommended that you use a PC that can run standard VR games and meets the system requirements for Steam VR. Although a lower spec PC may work, it also may not.
Oculus Link / Virtual Desktop
Since you will be streaming the content from your PC to your headset, you will either need to set up Oculus Link connection or use Oculus Air Link / Virtual Desktop if you prefer a wireless experience.
Note! Driver4VR only works in combination with SteamVR. You can not get full body tracking for games bought from the Oculus ecosystem.
For a complete tutorial video on setting up this method, check out the video below:
As you can see from the video, the full body tracking works really well and is pretty impressive! The setup is also largely based around downloading software and keeps your entire VR experience completely wireless when using Oculus Air Link or Virtual Desktop.
The biggest reported downside to using this method is the lag in tracking that users experience. For some it is tolerable whilst others render the experience simply not good enough.
Method #2: Full Body Tracking With Vive Trackers
Let me just say in advance that this method is for those who have a higher budget for full body tracking purposes.
If you’re paying the extra buck, then you do deserve the most “official” way to go about full body tracking with the Quest headsets. That’s exactly what this method is about: using HTC Vive trackers and base stations.
Here’s what you’ll need to make this method work:
HTC Vive Base Stations
These are the handy devices that allow for room-scale VR experiences. They retail on Amazon for usually a price slightly north of 100$.
Although you can get the job done with just one base station, it would be far from ideal since you’ll only be able to be tracking from one angle. Turning around in your VR world – something that commonly happens to us all, would break the base station’s tracking line. For this reason, it is highly recommended to have 2 of these ready to go!
The base stations will need to be placed around the room or the playing area such that they cover the space perfectly. If you don’t have high shelves or areas to place them, you might want to consider investing in a stand too!
HTC Vive Trackers
HTC Vive trackers work in combination with the base stations and make the magic happen. You’ll need at least 3 of them to get the best full body VR experience (one for each leg and one placed on the waist). You can check the current price and purchase from Amazon.
Tracker Strap
The trackers need to be placed on your body to track your movement hands free and wirelessly.
Perhaps the most convenient solution to this is to buy the Rebuff Reality TrackStrap Plus, which goes for $99.99. Since this is sometimes out of stock, a good alternative is also the Rebuff Reality Trackbelt which you can find on Amazon.
You may want to consider resorting to DIY methods if your budget starts to get tight here. Just make sure your trackers are properly fastened and don’t take any fall damage!
Oculus Link /Virtual Desktop
Either the official Oculus Link cable can be bought for $79.99, or you can take it easy on your wallet and use any high-speed USB cable. Check out my other article for cheaper link cable alternatives.
If you don’t want to go through the trouble of buying a cable or prefer a wireless experience, Oculus Air Link and Virtual Desktop can also be used.
Watch the video below for a complete tutorial on setting up full body tracking using this method!
The biggest reported downside, as also explained in the video guide, is with the calibration of the trackers between Steam VR and Oculus VR. Still, a fix is readily available. You’ll also want to keep an eye on how many USB ports you’re using and whether or not you’ll need an extended USB hub.
Note: Competitors to the Vive trackers, Tundra, are offering their trackers for $95 with supposedly better performance in some areas – such as utilizing a single USB port. Since the first deliveries are expected in July, I could not find any reliable reviews yet, but will update this article once they hit the market!
If you already have your heart set on the Vive trackers, do know that the Tundra trackers are fully compatible with the Vive ones and your money won’t be wasted!
Method #3: Full Body Tracking With Antilatency
Antilatency is another brand making a name for itself in the worlds of VR and motion capture. These guys operate mainly in the B2B space – which means they sell to other businesses rather than directly to users like you and me. However, they have been expanding their market and have made their products available to purchase!

Full body tracking with antilatency essentially combines what I’ve written in the previous two methods. Antilatency makes use of two main components for its tracking:
Tags
Attached to your legs individually, these tags act as the trackers for the camera. Overall, Antilatency takes over tracking your legs and your head, while the Oculus continues to track your hands via your controllers like normal.
You also have the option of using Antilatency’s arm bracers in place of your controllers for an even more “handsfree” experience!
Floor or Ceiling Tracking Areas
The reason the company made a name for itself was because of this wonderful piece of technology.
Antilatency lets you set up a floor or ceiling with special panels and emit individual infrared rays to be tracked. All in all, you have yourself a dedicated space for VR activities!
You may have guessed by now that Antilatency is prioritizing comfort here. Setting up the space is easy, calibration issues are practically non-existent, and there’s great potential in spicing up your VR experience!
As cool as it all sounds, it’s definitely going to cost you a lot! Here’s a breakdown of the minimum you’ll need:
| Item | Cost |
| Main Camera | $650 |
| 10 meter squared tracking area | $250 |
| Tags ($70 each) x2 | $140 |
| USB Socket | $50 |
| Total | $1090 |
If you’re still interested, visit their website for more information and placing your order.
Watch the video below for setting up your floor area:
There’s an option for ceiling tracking too if that’s more of what you’re looking for!
Once you have your equipment, follow the instructions here to set up Antilatency tracking. Be sure to collapse the “Attach the Tracker to Oculus Quest” menu in the setup!
Some VR enthusiasts expressed concern with the floor tracking system, saying that the tracking will be broken if the user looks too far up. Antilatency themselves have stated that, since the camera comes with a 240 degree field of view, it shouldn’t be a problem!
So to conclude, motion capture has fascinated VR enthusiasts for a very long time now, and these methods show that we are closer than ever to the truest VR experience!
HARDWARE USED FOR TESTING AND WRITING THE ARTICLES:
* Meta Quest 2 (My “daily driver” headset, which I absolutely love & recommend)
* Lenovo Legion 5 Pro (AMD Ryzen 5 5600H, Nvidia Geforce RTX 3060, 16GB RAM)
* TP-Link Archer C6 (budget dedicated router for Air Link, see my full setup tutorial)
ESSENTIAL QUEST 2 COMFORT ACCESSORIES:
* VR Cover Foam Replacement (one of the easiest & cheapest ways to improve headset comfort)
* BoboVR M2 Head Strap (reduce pressure on your head and improve the overall fit of the headset)
