
Looking for ways to adjust the visual properties of the Quest 2 display to make the experience more pleasurable? If that’s the case, then look no further! I did some research and hands-on testing on the topic to help you out.
You can change the brightness of the Quest 2 display by going to headset quick settings and adjusting the brightness slider. It is also possible to change the color space, adjust the display warmth or apply color correction filters from the accessibility features.
Let does next look at each of the different options in more detail!
Change Brightness Level
Meta has likely done a lot of end-user testing regarding the brightness of the Quest 2 LCD screen. Still, people are different and for some, the default setting is too bright whereas others find it too dimmed down.
Luckily, Meta took notice of the customer feedback and added the functionality to adjust brightness in software version 25.
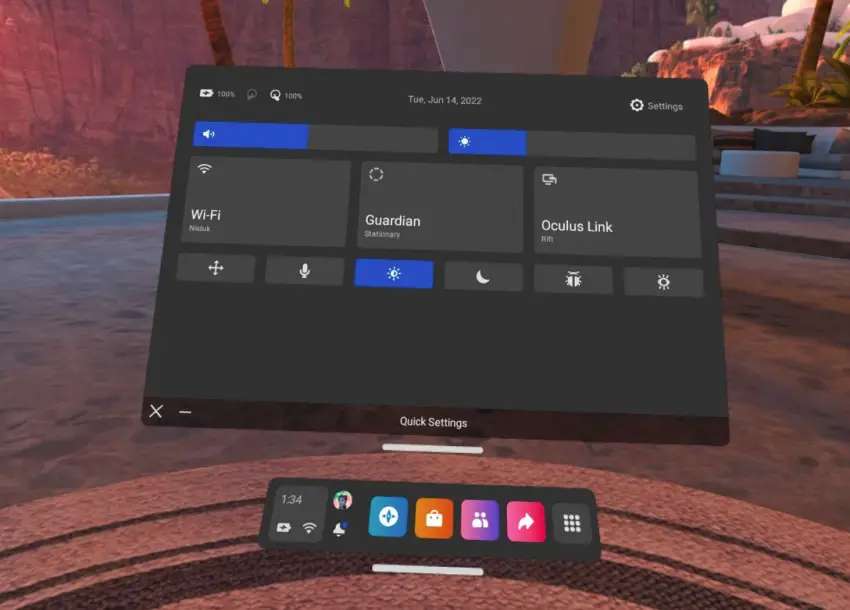
Follow these steps to change the brightness level settings of the Quest 2:
- Power on your headset
- Open the menu by clicking on the Oculus button on your right controller
- Open Quick Settings by clicking on the clock area
- Adjust the brightness using the slider on the top-right

It’s also possible to adjust the brightness of the Quest 2 using the following ADB command:
// [value] in the 0-255 range
adb shell settings put system screen_brightness [value]
Change Color Space
In Quest Build 41.0 Meta improved the color accuracy for Oculus Home, System UI and other 2D panel applications. They also introduced the option to change the Color Space settings for these areas (not applicable to VR games which use their own pre-defined color space)
Follow these steps to change the color space of your Quest 2:
- Go to Quick Settings
- Click on “Settings” (top-right of your screen)
- Open “Experimental Settings“
- Modify “Color space” settings
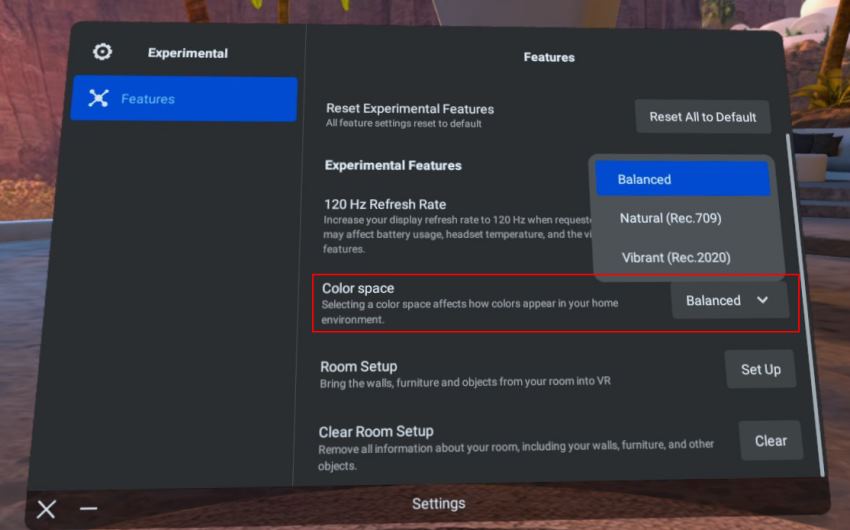
In theory, the “Balanced” color space option should provide optimal color settings. However, if you are unhappy with the current visual properties, then go ahead and also test with the Natural and Vibrant color space options to see if it is more to your liking.
Adjust Color Settings (Display Warmth)
I did some research about other ways to adjust the color settings of the screen but unfortunately, there aren’t that many options available.
One way to change the color settings of the Quest 2 is by following these steps:
- Go to Quick Settings
- Click on “Settings” (top-right of your screen)
- Open the “System” menu item
- Select “Display” from the menu on the left
- Enable “Night Display”
- Adjust colors using the “Display Warmth” slider

I actually really liked the change in colors when raising the display warmth slider just slightly above the minimum levels. But people are different and just have to test the different values out for yourself.
Once you have found the most suitable color settings for your preference, it’s possible to quickly enable/disable the night display functionality from the quick settings (the moon icon).
Apply Color Correction Filters
Another way to change the color properties of your headset is to enable the color correction functionality which makes selected colors easier to distinguish. Although listed as an accessibility feature, it might just help you towards more optimal visual properties.
Follow these steps to enable color correction on your Quest 2:
- Go to Quick Settings
- Click on “Settings” (top-right of your screen)
- Open the “Accessibility” menu item
- Select “Vision” from the menu on the left
- Enable “Color Correction”
- Test different “Filter” values
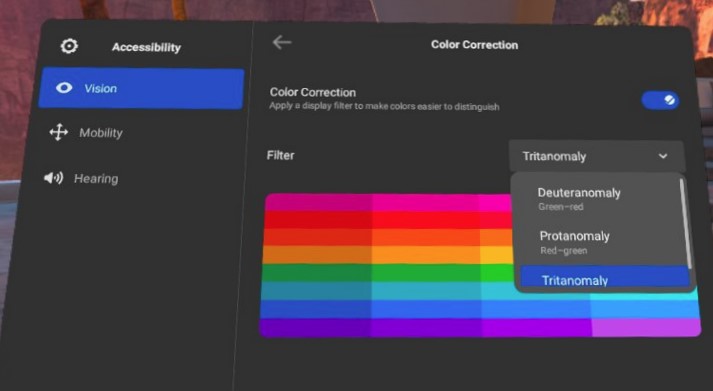
The functionality was implemented by Meta to help with the legibility of colors that are commonly difficult to differentiate. You have the option to choose from three different choices:
- Deuteranomaly (green-red)
- Protanomaly (red-green)
- Tritanomaly (blue-yellow)
For me personally, only the last option (“Tritanomaly”) was somewhat tolerable. However, go ahead and test the different color corrections yourself and see if there is one that makes things more pleasurable to watch for you personally.
Mix Things Up
My last recommendation for you is to try the brightness and color settings mentioned in this article in combination with each other.
For example, go ahead and adjust the screen brightness together with color warmth (Night Display). I personally found it quite pleasurable, when both the brightness and color warmth were set to just slightly above the minimum values.
Throw color correction into the mix and simply test a variety of different combinations you can think of. Who knows, you might arrive at just the right visual settings in the end.
HARDWARE USED FOR TESTING AND WRITING THE ARTICLES:
* Meta Quest 2 (My “daily driver” headset, which I absolutely love & recommend)
* Lenovo Legion 5 Pro (AMD Ryzen 5 5600H, Nvidia Geforce RTX 3060, 16GB RAM)
* TP-Link Archer C6 (budget dedicated router for Air Link, see my full setup tutorial)
ESSENTIAL QUEST 2 COMFORT ACCESSORIES:
* VR Cover Foam Replacement (one of the easiest & cheapest ways to improve headset comfort)
* BoboVR M2 Head Strap (reduce pressure on your head and improve the overall fit of the headset)