
Are you trying to use Quest 2 cloud sync to view the recorded videos and screenshots on your phone, but can not get the functionality to work properly? If that’s the case, then you have arrived at the right place!
In this article, I am going to cover the media syncing issues I have faced myself (with solutions) and also various problems that I have seen other users having.
The most common solution if the Quest 2 media sync is not working properly, is to reboot both your headset and phone. Sometimes you also just need to wait a bit longer for the media files to appear on your phone. Another common solution to make synced files available is to log out from the Oculus phone app or reinstall the app completely!
There are a variety of different issues and solutions – let’s next look at them in more detail.
Synced Media Not Showing Up in Oculus App
The most common issue with the Quest 2 media cloud sync functionality seems to be that the synced photos and videos are not showing up in the Oculus app.
If that’s also the case for you, then follow these steps to potentially overcome the issue and get your media files synced correctly.
1) Reboot Your Headset and Phone
“Have you tried turning it off and back on again” are words that you are very likely to hear when dealing with various tech support issues.
The Quest 2 is no different in this regard and the first thing I would recommend is to restart both your headset and phone and see if the synced files appear. If not, then proceed to the next steps.
2) Wait For Media Sync to Complete
The weird thing about the Quest 2 cloud sync is that even though it might say “Synced – 14 days left”, it’s often the case that the synchronization is actually still in progress.
There have been two main problems for me personally that were solved simply by waiting a bit longer:
- Certain files not appearing in the Oculus phone app gallery
- Videos not playing (the “No connection” Wifi icon issue)
I don’t know why the Quest 2 sometimes displays the wrong synchronization status, but it has happened to me numerous times. So if you are not seeing some (or all) of the files I recommend you to wait and give it another 5 to 10 minutes.
Sometimes it might also very well be that the Cloud sync service is experiencing interruptions and you might have to wait longer. Patience, my friend!
3) Log out of Oculus App
Another step you can take to make the media files appear is to log out of the Oculus App and then back in again. This shouldn’t really be the case and seems to be a bug in the software – but hey, it is what it is.
Although Meta changes the user interface of the phone app quite frequently, you can currently log out of the app by clicking on the “Menu” icon (bottom-right) and then “Sign out”.
4) Reinstall Oculus App
There seems to be a bug in the Oculus app update process that Meta (Oculus) has yet to fix for quite a long time.
The issue is that when you update the Oculus App through Google Play Store, the update won’t complete properly and leaves the app in a “conflicted” state (not sure if this is also the case for iOS)
Anyway, to overcome the issue and potentially also make the synced media appear in the app, go ahead and uninstall the Oculus App completely and then do a fresh installation from the Google Play Store.
When researching the media syncing issues, reinstalling the Oculus app seems to have been one of the most common solutions that actually helped people. So make sure to try it out!
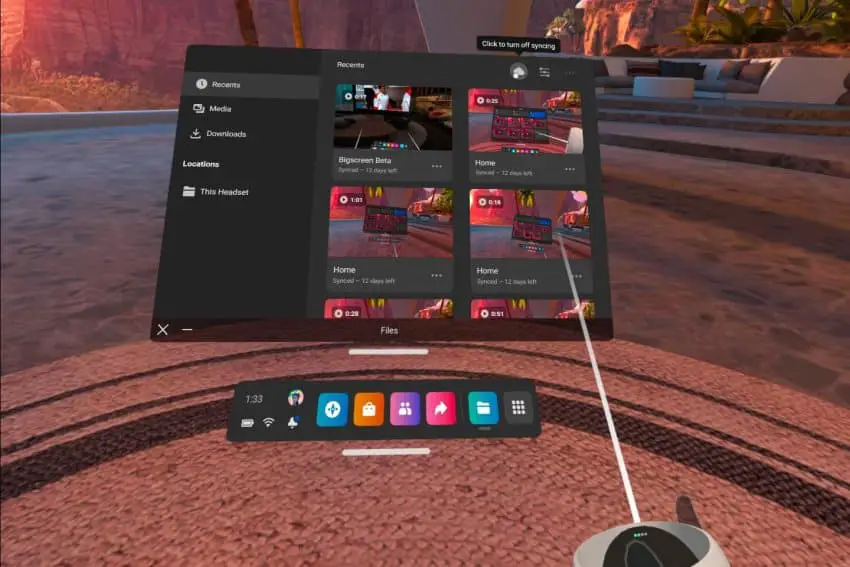
5) Enable / Disable Cloud Sync
Another thing that’s worth trying is to disable cloud sync in the “Files” app of your Quest 2 for a minute or two. After doing so, go ahead and re-enable syncing and see if it has helped your media files appear in the app.
6) Force Manual Synchronization
When you want some specific photo and/or video files to be synced to your phone, then it might be a good idea to force the synchronization by clicking on the “three dots” icon and then selecting “Sync” for this specific file
7) Try Regular File Transfer
The Cloud Sync functionality is nice and everything, but hey – if you can’t get it working properly, there is no use for it.
And to be fair, even if it is working, it’s not the most user-friendly (e.g if you want to download all the media files to your phone’s local storage).
So consider connecting your Quest 2 with your PC (or phone) and transfer the files this way. This is how I personally do it 95% of the time.
No Cloud Sync Button in the “Files” App
If you are one of the unlucky ones who can’t start the media syncing process in the first place (no cloud sync button in the “Files” app) then first make sure that you are logged in as the admin account of the headset. Syncing is not available to secondary accounts of the headset.
Also, make sure that you are actually opening the “Files” app in your Quest 2 and not “File Viewer”. It’s only the former that has the ability to sync media files to your phone.
When you are not still seeing the “Sync” button, then make sure both your headset and Oculus app are up to date (with your headset connected).
Since the problems are often related, make sure to test out the steps listed earlier in the article.
“No Connection” Wifi Icon Appears When Trying To Watch a Video
When I first completed the synchronization of my media files and tried to access the videos from my phone, I was greeted with a “no connection” Wifi icon and the video did not start playing
There was actually nothing wrong with my network connectivity and all I had to do was wait a bit longer until the synchronization process was actually completed (even though it already said so in the Quest 2 Files app).
Some people have claimed that using the mobile internet connection has helped them overcome the issue and see the synced videos. I personally didn’t have to do this and also recommend you to simply give it some time and try again later.
HARDWARE USED FOR TESTING AND WRITING THE ARTICLES:
* Meta Quest 2 (My “daily driver” headset, which I absolutely love & recommend)
* Lenovo Legion 5 Pro (AMD Ryzen 5 5600H, Nvidia Geforce RTX 3060, 16GB RAM)
* TP-Link Archer C6 (budget dedicated router for Air Link, see my full setup tutorial)
ESSENTIAL QUEST 2 COMFORT ACCESSORIES:
* VR Cover Foam Replacement (one of the easiest & cheapest ways to improve headset comfort)
* BoboVR M2 Head Strap (reduce pressure on your head and improve the overall fit of the headset)