
The Oculus Link functionality, which allows your Oculus Quest 2 turn into a PC VR headset is no doubt an excellent feature. When it works properly, that is.
The sad truth is that due to many different layers of hardware/software and the interdependencies between them, you are bound to bounce into problems.
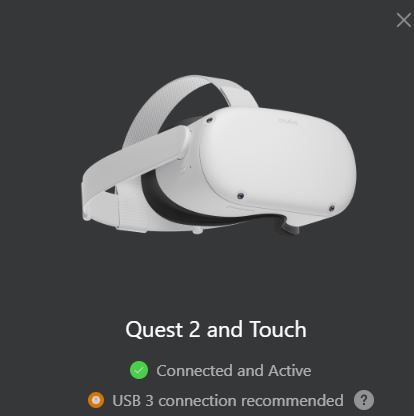
If you are currently battling with the issue of your Oculus Quest 2 recognized as a USB 2 device and the “USB 3 Connection Recommended” notification being displayed, then you have arrived at the right place.
In this article, I will be guiding you through various troubleshooting steps and fixes which will hopefully help you solve your problems and dive right back into the wonders of VR.
Did you hear? Facebook (Meta) is going all-in on virtual reality and the metaverse. Get a Quest 2 headset and be a part of the future of entertainment!
1) Do a Proper Restart Cycle
In the context of the Oculus Quest 2 headset, there is a difference between a restart and a “proper restart”.
Due to the way that the USB and Oculus Link connection is initialized and established between your PC and Quest headset, you want to make sure that you are restarting the right way:
- Unplug the USB cable from your PC
- Turn your Quest 2 off and then back on again
- Restart your PC
- Start the Oculus software
- Plug in your Quest 2 headset
Doing restart this way you can be sure that both your PC and the Quest 2 are fully initialized before attempting to launch the actual connection between them. You’d be surprised how many USB connectivity issues this way of restarting has solved.
If however your problem still persists, I would also also suggest using this method when trying other other troubleshooting steps coming next in this article.
Did you hear? Facebook (Meta) is going all-in on virtual reality and the metaverse. Get a Quest 2 headset and be a part of the future of entertainment!
2) Flip the USB Cable Around and Try Different Port Orientations
Sometimes the solution to the problem of your USB connection detected as 2.0 might be as simple as flipping the cable ends around. The cable end that previously was in your Quest 2 headset now goes in your PC USB port and vice versa.
This is of course only applicable if your cable is USB C to USB C.
Another thing to try with a USB-C connector is to plug the cable in with a different orientation, as some USB ports actually only detect USB 3.0 in a certain orientation.
I know it might sound a bit funny, but the reality is that this has helped many people correctly establish a USB 3 connection between the Quest 2 and their PC. So just test it out and see if it makes any difference for your specific case.
3) Try Different USB Ports on Your PC
There are several reasons why you would want to test out multiple USB ports on your PC:
- Some USB ports are physically connected to your PC`s motherboard whereas others are connected to the motherboard via short unshielded wires which might cause signal degradation (and cause USB 2.0 to be used)
- Some USB ports on your PC might actually only support USB 2.0 and not 3.0
- Incompatibilities between specific USB ports and your Quest 2 / Oculus Link
- The USB port might just be in a bad state for this run cycle or malfunctioning altogether.
Go ahead and test several USB ports when trying to establish the connection between your PC and Quest 2.
Combine this with hints from the last method and I would also suggest you throw in an occasional restart to start from a blank sheet.
4) Solve USB A to USB C Adapter Related Issues
If your PC does not have a USB C port and you are currently using a USB A → USB C adapter to establish the connection, there’s a couple of things to keep in mind.
4.1) Make sure your USB adapter supports USB 3.0
Many USB adapters actually only support the USB 2.0 protocol. If you already own an adapter or are buying one, make sure that it supports the USB 3.0 protocol. For example, this USB A → USB C adapter from Amazon will work properly with Oculus Link.
4.2) Flip Orientation of the Cable in the Adapter
Some adapters only detect a USB 3.0 connection when the cable is inserted in a certain orientation. Try unseating and reseating the cable in the alternative orientation.
5) Try Different USB Cables
One sure thing to try out when you are unable to get a USB 3.0 Oculus Link connection is to try alternative USB cables.
Many people have been unable to get a USB 3.0 connection from a certain cable (that is USB 3.0 compatible) and after trying an alternative the problem is somehow solved.
Maybe you have a spare cable lying around that you can test out. If not, I have previously written an article on Oculus Link cable alternatives that you could buy and test out.
6) Update USB Drivers
One remedy against various USB connectivity issues is to make sure you are using the latest drivers for your USB controllers.
You can either search and update the USB drivers from the Windows update library or download and install the drivers from the manufacturer. Click on the link for an article listing step-by-step instructions to update your USB drivers.
7) Disable USB Power Saving
One possible cause for USB 3.0 connectivity issues is Windows unexpectedly reducing or cutting power output to the USB ports.
To avoid this, it is a good idea to disable the USB power saving option. Go to Device Manager on your PC, navigate to “Universal Serial Bus Controllers”, right-click and “Properties”, navigate to “Power Management” and disable the “Allow computer to turn off this device to save power”.

Just to be sure, do this for all of your USB port controllers and and restart your PC (or complete the full restart cycle) afterwards.
8) Disable USB Selective Suspend
Similar to the last method described, it would also be a good idea to disable the Windows USB selective suspend when facing various USB connectivity issues.
The problem with this feature is that it might unexpectedly put your USB port in a low-power state which does not go too well with Oculus Link.
To disable USB selective suspend, follow this step-by-step guide.
9) Change USB Related BIOS Settings
Another thing to try out when you are unable to get a USB 3.0 Oculus Link connection is to change the following options in your BIOS settings (if applicable to your specific manufacturer and BIOS settings).
- Disable Legacy Boot Mode
- Disable Turbo Boost Mode
- Disable USB Attached SCSI Protocol (UASP)
10) Repair / Reinstall Oculus Software
The last method to solve your Oculus Link problems in this article is to try a repair or fresh install of your Oculus software.
Download the latest Oculus Software and launch the setup. Try the repair process first.
If that does not change anything for you, complete the uninstall process and make sure you also delete leftover files in Program Files under the Oculus folder.
After that, do a fresh install of the Oculus Software.
HARDWARE USED FOR TESTING AND WRITING THE ARTICLES:
* Meta Quest 2 (My “daily driver” headset, which I absolutely love & recommend)
* Lenovo Legion 5 Pro (AMD Ryzen 5 5600H, Nvidia Geforce RTX 3060, 16GB RAM)
* TP-Link Archer C6 (budget dedicated router for Air Link, see my full setup tutorial)
ESSENTIAL QUEST 2 COMFORT ACCESSORIES:
* VR Cover Foam Replacement (one of the easiest & cheapest ways to improve headset comfort)
* BoboVR M2 Head Strap (reduce pressure on your head and improve the overall fit of the headset)
