
Wireless VR gaming is convenient in so many different ways. Being able to rotate freely and move around without wires getting in the way simply adds an additional layer of immersion to the overall VR experience.
Once you try wireless, you never go back. At least I won’t.
In this article, I am going to explain why I was comfortable buying a budget router (TP-Link Archer C6) for my Oculus Air Link setup, which ended up fixing all the performance issues I was previously having with my main router.
Finally, I am also going to give you the full step-by-step guide on setting the router up (how to connect ethernet cables and adjust router networking settings). If you are interested I have also made a video about the performance (real-time bitrate, latency, and gameplay) I am getting from my setup.
So without further ado, let’s get started!
What Do You Actually Need for Oculus Air Link?
When you start reading about Oculus Air Link and the setup process, things might get very confusing quickly. Do you need a dedicated router? Should it be in router or Access point mode? 2.4GHz vs 5GHz? AC or AX?
After a bit of reading and researching, things quickly become much more clearer. I am next going to try and guide you through the things I learned as simply as I can.
Try Air Link with Your Current Router
If you haven’t already, the first recommendation is to test Air Link out with the current router you have. If it is not too old, there is a good likelihood that Air Link will work just fine on it. Couple of things to keep in mind:
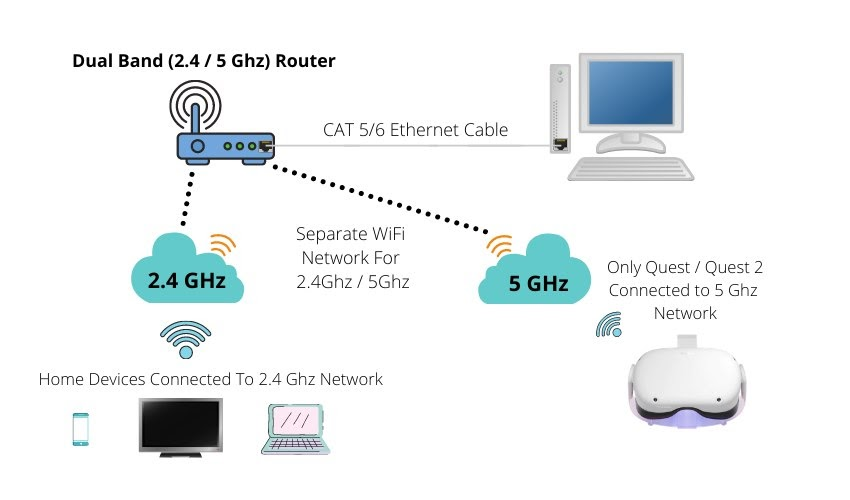
- Set up a 5GHz Wi-Fi network in the router settings for your headset to use
- Connect your PC to the router via an ethernet cable
- Make sure the router is close to the play area (ideally in same room)
If you are more of a visual guy/gal, here is a diagram to illustrate the setup in more detail.
Test the Air Link connection out and see how it performs. If you are having performance problems, make sure to go through the steps in my previous troubleshooting articles here and here.
Note! I am hereby assuming that you have already tried the regular wired Oculus Link connection. Even when using the USB 2.0 charging cable included in the package, you can get a performance comparison point and make sure that your PC is not the bottleneck.
Router Requirements for Air Link (You Don’t Actually need Wi-Fi 6)
When you did your best to get wireless PC VR gaming to work on your current setup, but it simply won’t perform (as was the case for me), it might be the time for getting a new router.
But what kind of a router do you actually need?
When you are planning to keep your current ISP router and get a new one just for Air Link, a good Wi-Fi 5 (AC) router will do just fine. Consider getting a Wi-Fi 6 (AX) router if you live in a very crowded area (it handles congestion better) or if you are thinking of replacing your current main router (Wi-Fi 6 is more future-proof).
In most scenarios, you won’t get an improved Oculus Air Link performance when going for a Wi-Fi 6 router over a Wi-Fi 5 one. Neither one is able to reach the theoretical maximum speeds (~1200Mbps vs 866Mbps) with Air Link and realistically you will be playing in the 100Mbps area.
In fact, a good Wi-Fi 5 router is very likely to perform much better with Air Link than an average Wi-Fi 6 one. We are really not after maximum throughput speeds here and instead, we simply want a router that is able to provide a stable LAN (local area network) where your PC and headset can communicate with each other.
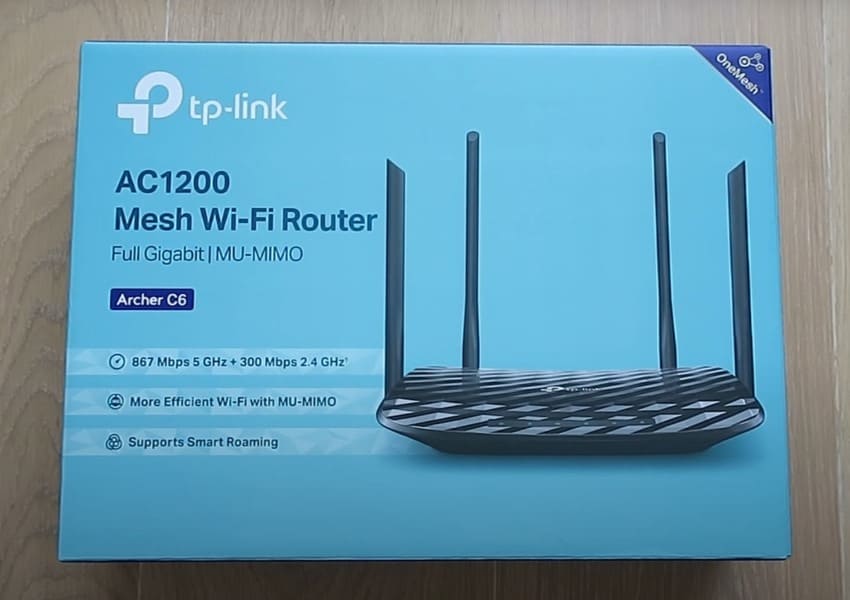
I personally went with the route of keeping my current router and getting a good dedicated Wi-Fi 5 router (TP-Link Archer C6) just for Air Link. I got the router for 40$ (click on the link for the current price) and it has worked perfectly for me this far.
If you are sure you want a Wi-Fi 6 router, a couple of recommendations that have proven to work well with wireless PC VR are Asus AX55 and Asus RT-AX86U. Both of them are also recommended by the developer of Virtual Desktop, Guy Godin, who has been involved in the world of wireless PC VR for a long and definitely has experience on the matter.

So any one of these routers is a safe bet in terms of the performance you can expect from Air Link (or Virtual Desktop). It comes down to your price tolerance and the secondary requirements you have for the router.
How To Set Up Dedicated Router For Oculus Air Link
Dealing with routers and networking might seem daunting for many. Fortunately, the basic setup of adding a dedicated router for Oculus Air Link is actually quite easy.
I am next going to describe my router setup and configuration for Air Link, which has proven to give me a stable and low latency connection (~5 to 8ms average network latency). Let’s get started!
Things you need:
- TP-Link Archer C6 (or A6) router. The manual is based on these ones, but configuration is similar for other routers.
- Long enough CAT 5 / CAT 6 ethernet cable to connect your current and the new router
- Ethernet cable to connect your PC and the new router (a short one is included in the router package)
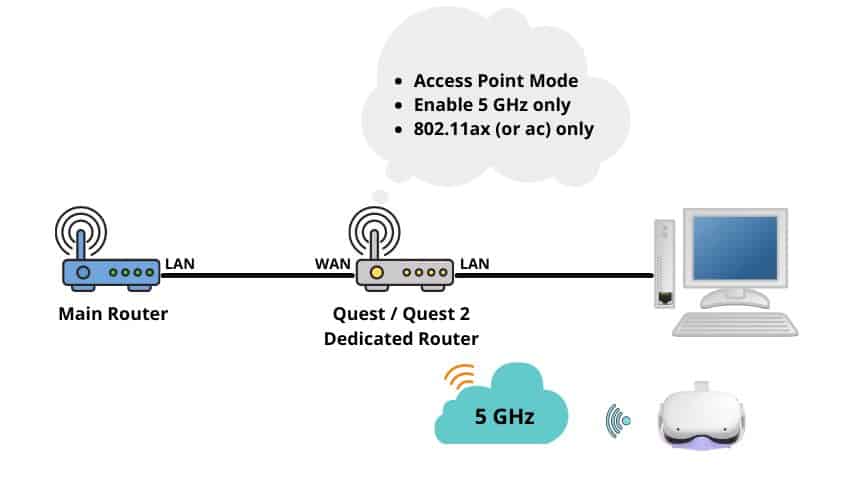
The very basic diagram to illustrate the setup I am going to describe is following:
Connecting Ethernet Cables
- Grab you current main router and plug one side of an ethernet cable into an Ethernet / LAN socket. There are usually 4 or more of these and they are used to share internet with devices (in this case, the new router)
- Plug the other end of ethernet cable to the “Internet” socket of the new router.
- Take a second ethernet cable to connect your PC and the new router. Plug one end to the “Ethernet” port of the new router and the other one to your PC.
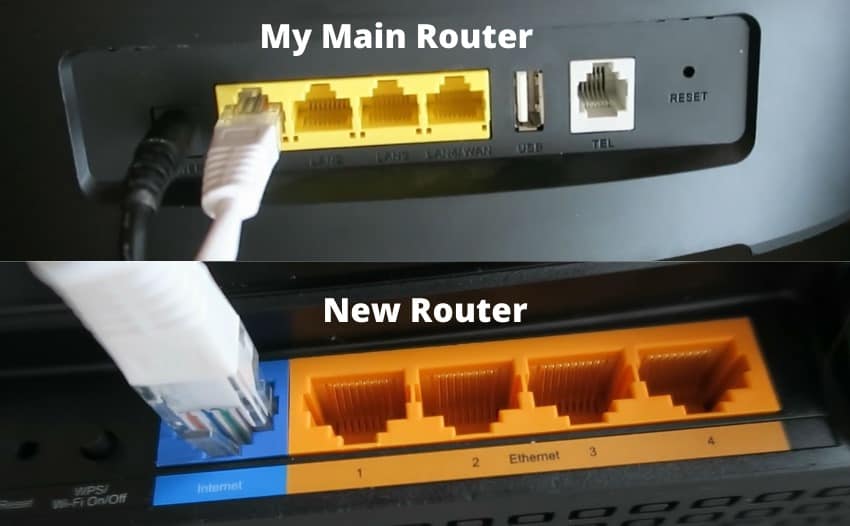
Keep in mind that my main router gets internet over the air (it has a SIM card inserted into it) and that is why there are no incoming ethernet cables. Your main router most probably has a land cable coming into it that provides the internet connection.
Router Configuration
- Plug in the power cord and turn on the new router.
- Wait a couple of minutes until the green and orange lights on the router stop blinking and turn into solid greens.
- If prompted in your PC, add the new LAN as “Private Network”. Selecting “Public network” can cause issues with Air Link.
- Open browser in your PC and go to http://tplinkwifi.net
- Create password for your admin console access and then log in.
- Navigate to “Advanced” → “Operation → set router to “Access Point Mode and click on Save.
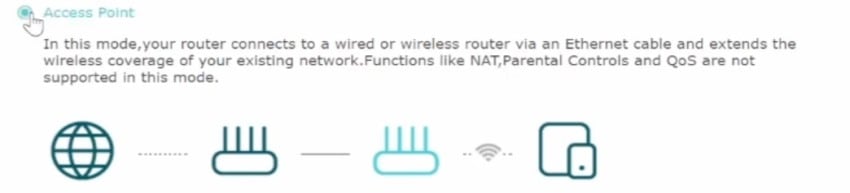
- Wait a couple of minutes for the operation mode settings to apply.
- If you are being logged out after AP is enabled then that is OK. Simply log back in.
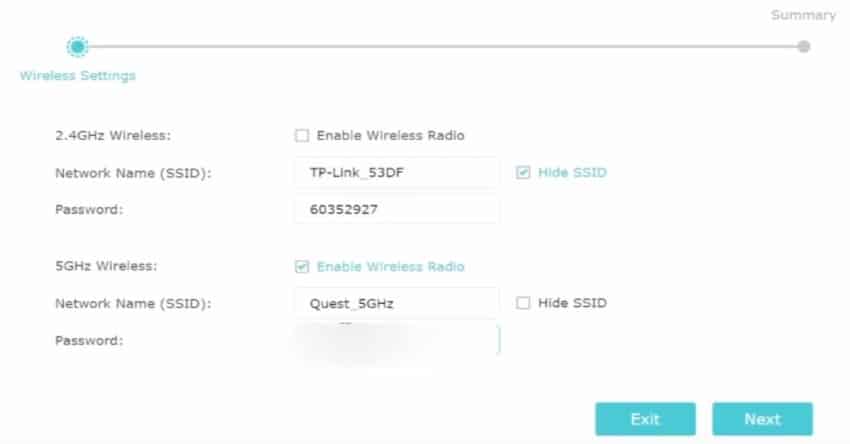
- Disable 2.4GHz Wi-Fi network by unticking “Enable Wireless Radio” option and enabling “Hide SSID”.
- Set a network name and password for the 5GHz Wi-Fi network. Click “Next” and and then “Save”
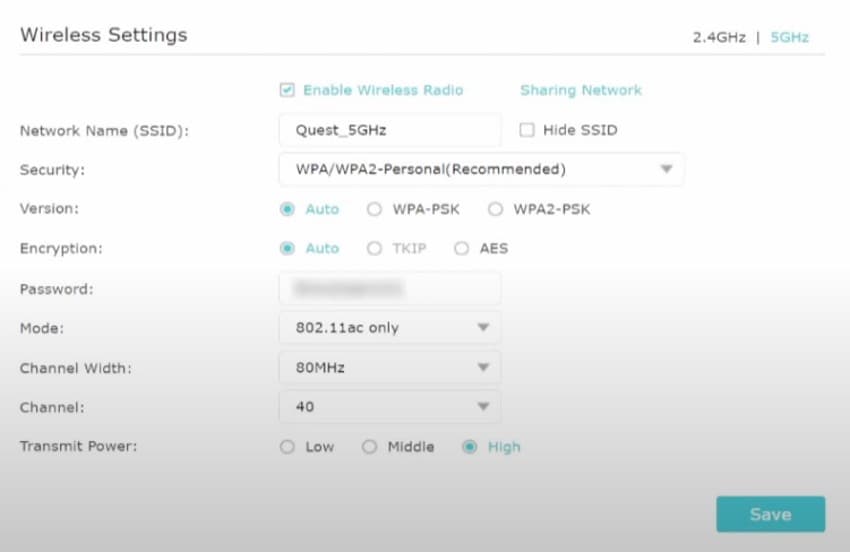
- Navigate to “Settings” → “Wireless” → “Wireless Settings”
- Select to modify “5GHz” settings (middle right)
- Set “Network Mode” to 802.11AC
- Set “Channel Width” to 80Mhz
- Use Wi-Fi Scannel to determine unused network channels and select appropriate one from the list
- Select “Transmit Power” to High
- Save the settings
And that’s pretty much all you have to do regarding router setup and configuration for Air Link. In case something was left misunderstood, you can also find the step by step guide in video form below:
Now, all that is left to do, is to enable Air Link in Oculus Software (Settings → Beta) and also from your headset settings. After that, you should be prompted in the headset whether you want to connect and launch the Air Link connection and start enjoying the wonders of wireless PC VR.
I hope the article was useful for you and that following the guidelines, you are able to get a similarly smooth VR experience as I did. If you have any questions or problems, leave a question under the Youtube video!
HARDWARE USED FOR TESTING AND WRITING THE ARTICLES:
* Meta Quest 2 (My “daily driver” headset, which I absolutely love & recommend)
* Lenovo Legion 5 Pro (AMD Ryzen 5 5600H, Nvidia Geforce RTX 3060, 16GB RAM)
* TP-Link Archer C6 (budget dedicated router for Air Link, see my full setup tutorial)
ESSENTIAL QUEST 2 COMFORT ACCESSORIES:
* VR Cover Foam Replacement (one of the easiest & cheapest ways to improve headset comfort)
* BoboVR M2 Head Strap (reduce pressure on your head and improve the overall fit of the headset)