

Are you trying to sideload third-party games and applications on your Quest 2 using SideQuest but don’t want to (or can’t) use a wired (USB) connection? If that’s the case, then you arrived at the right place!
I spent some time on it and tested three different methods for using SideQuest wirelessly directly on your headset or establishing a wireless connection to your PC or phone.
The only true way wireless way to use SideQuest with your Quest 2 is to sideload the application on your headset. SideQuest also has wireless modes for the desktop and mobile applications, but these require you to first establish a wired connection using a USB cable before you can use SideQuest wirelessly.
Let’s explore all of the options mentioned and their pros and cons in more detail.
You Need your Phone or PC and a USB Cable to Get SideQuest Working Wirelessly
As mentioned, there are currently three different three methods that allow using SideQuest and installing third-party games and custom applications wirelessly. These options are:
- Sideload the SideQuest app on your Quest 2
- Use the SideQuest wireless mode on your PC
- Establish a wireless connection using your phone
The downside here is that all of the methods initially still require you to have an external device (PC or phone) and a USB cable to get them working properly.
The big differentiator is that for the first method (sideloading and using SideQuest directly on your headset) you only need the USB cable once to install the app on your Quest 2. Once the SideQuest app is sideloaded to your headset, using SideQuest is all wireless from here on and no USB cable is needed.
The other two methods (installing SideQuest on your PC or phone) require you first to establish the connection using a USB cable each time you power on your headset. After the connection is established, you can enable the wireless mode and disconnect the cable.
Note! All of the methods I am going to describe require you to have developer mode enabled on your headset. If you haven’t done this, click on the link for a step-by-step tutorial.
1) Install SideQuest on your Quest 2
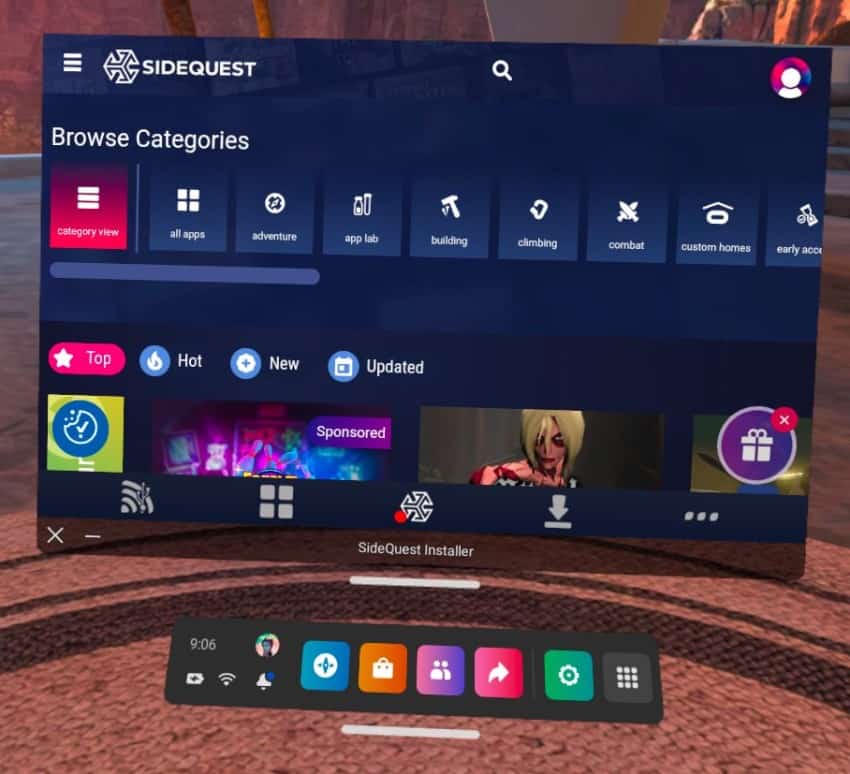
The best option for using SideQuest wirelessly is to sideload the mobile version of the SideQuest application to your headset. You can then install games and applications from the SideQuest library directly in your headset without needing to connect any cables or external devices.
Note! You can not install APK files downloaded from external sources using this method. If you want to install custom APK files, you need to use the SideQuest desktop app or Bugjaeger on your phone.
Another thing to keep in mind here is that during the setup process (to get SideQuest sideloaded on your headset), you will still first need SideQuest installed on your PC (or phone) and a USB cable to connect the devices.
Connecting the cable and installing the app on your headset is a one-time activity and once SideQuest is installed on your Quest 2, you can sideload applications in your headset wirelessly over the local Wi-Fi network.
Follow these steps to sideload SideQuest to your Quest 2 headset:
- Connect your headset to SideQuest set up on your PC (or phone)
- Download SideQuest Mobile APK (choose “Experimental”)
- Install the downloaded APK on your headset
- Launch SideQuest on your headset (from “Unknowns sources”)
- Allow file access for SideQuest
- Create an account and log in
- Allow “Install” privileges for SideQuest when prompted during sideloading
Congratulations! You should now be able to sideload games and apps wirelessly directly in your Quest 2 headset. If you had any problems during the setup, the Youtube video below explains the installation process nicely.
Note! As of June 2022, the mobile version of SideQuest is still in early-access / experimental mode, and some functionalities don’t work correctly. For example, you can not currently change headset advanced settings (refresh rate, CPU and GPU level, etc). However, this might be fixed by the time you are actually reading this article!
2) Enable SideQuest Wireless Mode on your PC
Another method for using SideQuest wirelessly is to first establish a wired (USB cable) connection to the SideQuest desktop application and then enable the wireless mode using the wireless icon in the menu tab.
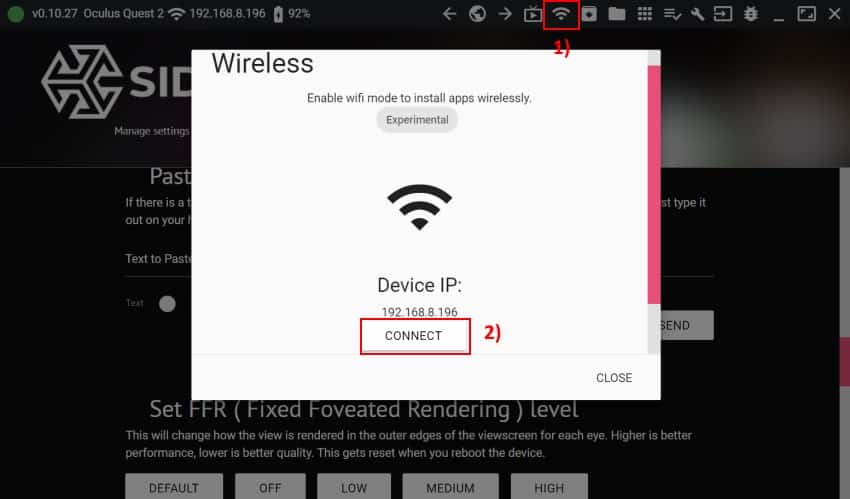
Once the wireless connection is enabled, you can then unplug the USB cable from your Quest 2 and it will remain connected to the PC over WiFi. This allows you to install games, custom APKs, change the headset’s advanced settings, and do all the things you would normally be able to do.
Note! Make sure to check out my detailed article about SideQuest settings and tools where I test and explain all the advanced configurations you can make to your headset.
The wireless SideQuest connection will remain active until you either reboot your PC or headset. At this point, you will have to reconnect the devices using a USB cable and can then enable wireless mode again.
3) Wireless SideQuest Connection Using your Phone
The next method for using SideQuest wirelessly is quite similar to the last one, only this you are going to use your phone instead of your PC.
Again, the downside is that before you can establish a wireless connection to the SideQuest application installed on your phone, you must first establish the initial connection using a USB cable. After that, you can unplug the cable and use SideQuest over WiFi.
The steps to install and enable SideQuest wireless mode using your Android phone:
- Install and launch the SideQuest mobile app on your phone
- Turn on your headset
- Make sure your phone and headset are connected to the same WiFi network
- Connect your phone and headset using a USB cable
- Allow permissions both from your phone and headset
- Make sure the headset is successfully connected (Green dot on SideQuest logo)
- Tap the WiFi icon in the SideQuest app
- Click on “Enable WiFi“
- Allow connection prompts in the headset
- Click on “Connect” in the SideQuest App
Once the wireless connection is successfully established you can go ahead and unplug the USB cable and continue using the app wirelessly. The wireless connection will remain active until you reboot your headset or terminate the connection from the app.
If you have any issues with establishing the initial wired or wireless connection try unplugging and USB cable and plugging it back in. Make sure to also watch the Youtube video above for a detailed step-by-step tutorial.
SideQuest Allows Wireless Casting and Streaming on Your PC
One great benefit of the SideQuest is that it allows wireless casting of your headset into your PC which is very useful for streaming, showing the content to your friends and family, or simply recording videos.
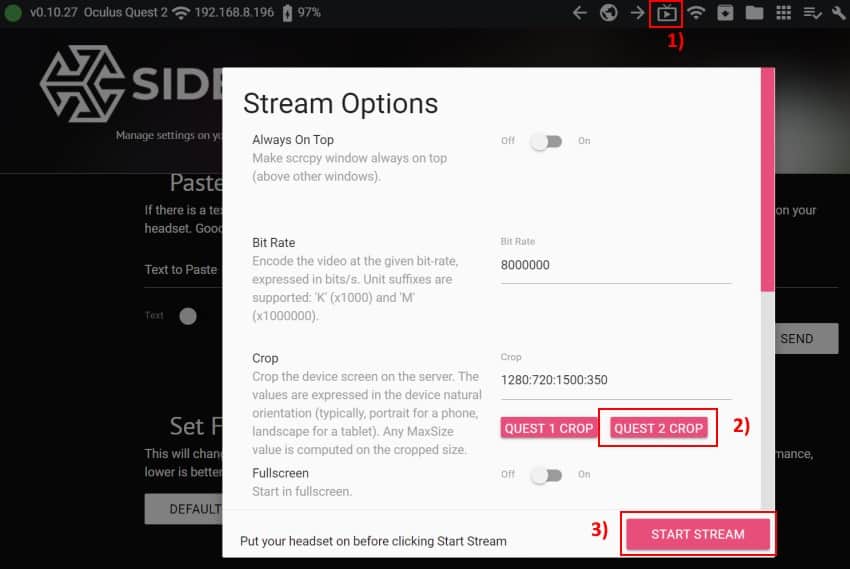
In order to do so, first enable wireless mode in the SideQuest desktop application by following the guidelines listed earlier in the article. Once that is done, click on the “Play” icon in the SideQuest application, select “Quest 2 Crop” and start streaming by clicking on “Start Stream”
Once that is done and you want to stream the video (Youtube, Twitch, etc) or record your gameplay you can use an application called Open Broadcaster Software (OBS). If you google it, you can find loads of tutorials on how to use OBS with your Quest 2.
HARDWARE USED FOR TESTING AND WRITING THE ARTICLES:
* Meta Quest 2 (My “daily driver” headset, which I absolutely love & recommend)
* Lenovo Legion 5 Pro (AMD Ryzen 5 5600H, Nvidia Geforce RTX 3060, 16GB RAM)
* TP-Link Archer C6 (budget dedicated router for Air Link, see my full setup tutorial)
ESSENTIAL QUEST 2 COMFORT ACCESSORIES:
* VR Cover Foam Replacement (one of the easiest & cheapest ways to improve headset comfort)
* BoboVR M2 Head Strap (reduce pressure on your head and improve the overall fit of the headset)