
Are you trying to get Minecraft working in VR but are facing problems? If that’s the case, you have arrived at the right place!
In this article, I am going to share a variety of different steps you can take when you are having issues playing either Minecraft Java or Bedrock edition in VR.
I personally used a Meta (Oculus) Quest 2 headset for testing and installing both Minecraft editions (see my step-by-step setup guides), but most of the solutions should be applicable to other VR headsets as well.
The article is divided into the following sections:
- General checks and steps to solve Minecraft VR issues
- Troubleshooting Minecraft VR Java Edition
- Troubleshooting Minecraft VR Bedrock Edition
So without wasting any more time, let does get right into it!
First Steps When Minecraft VR is Not Working (Crashing, Not Launching, etc)
The truth is that there are so many different reasons why Minecraft VR might not be working properly. Whether the game doesn’t launch at all, throws a specific error message, or crashes right after you have started it.
In this specific section, I have included the most general guidelines and checks that are applicable both for Minecraft Java as well as the Bedrock edition. Later on, I will be diving into both of the different Minecraft editions separately to give more specific advice.
1) Check PC Requirements
In order to play Minecraft in VR, you are going to have to own a semi-decent gaming PC. The minimum requirements to run PC VR (Oculus Link / Air Link) with a Quest 2 are approximately following:
| Component | Recommended Specs |
| Processor | Intel i5-4590 / AMD Ryzen 5 1500X or greater |
| Graphics Card | NVIDIA GeForce GTX 970 comparable or better |
| Memory | 8 GB+ RAM |
| Operating System | Windows 10 |
The most important part here is that your PC should have a dedicated graphics card. VR games simply won’t run on a laptop with an integrated graphics card for example. If you are interested, I have made a more detailed article about Quest 2 PC VR requirements along with compatible GPUs.
With that being said, for Minecraft VR you can probably even get away with a PC slightly under the minimum requirements. Do also take into account here that the Minecraft Bedrock edition is easier to run than the Java edition. So if you know your PC is not that good, test Minecraft Bedrock edition first.
2) Run the Game in Regular Mode
Most of you have probably done this already, but before trying to launch Minecraft in VR, make a test run of the game in regular flat screen mode. Especially if you just installed the game.
By running the game, it will automatically create all the necessary configuration files and folders.
Secondly, you can verify that the game does indeed work in regular flat screen mode. If it doesn’t, there is no point in trying it in VR, is it?
3) Establish PC VR Connection Before Running Minecraft
Since your PC will be doing all the hard work of running the game, then before running Minecraft you are going to have to establish a PCVR connection between your headset and PC.
For the Quest 2, this means that you establish a regular wired Link or Air Link (wireless) connection and then launch either Minecraft Java Edition (Vivecraft) or Bedrock edition. For the Minecraft Java Edition, Virtual Desktop will work as well.
If you launch Minecraft before connecting your headset and PC, the game will understandably only start on your PC (and will not probably work as expected)
4) Try other PC VR methods
I have learned from my personal experience and the comments/questions voiced by other VR users that if you are having trouble with one PC VR method, it is almost always a good idea to try another one.
If Minecraft Java edition does not work for you with Air Link, try Virtual Desktop or wired Link connection. When Minecraft Bedrock Edition does not work with your preferred Link connection, try the other one.
There are two potential outcomes here. You either get the game working by trying an alternative method or you get additional information you can use for further troubleshooting.
5) Restart your PC & Headset
Restarting your devices is such an easy, yet one of the most effective ways to solve different problems. I can not count the number of times that restarting my Quest 2 and PC has solved unexpected PC VR issues I have faced.
So just go ahead and restart both your PC and headset and try launching the game again. You might be surprised!
MINECRAFT VR JAVA EDITION ISSUES (Vivecraft)
Now it is time to get more specific and discuss the problems you might face with both of the different Minecraft editions separately.
Before we start, make sure to read my step-by-step Minecraft Java Edition installation article or watch my tutorial video below, so you can make sure that you took all the required steps and didn’t miss anything important!
If you seem to have done the installation process correctly but still couldn’t get the game running properly, then let’s go ahead and proceed with specific troubleshooting steps.
1) Check that SteamVR is Installed & Running Properly
Vivecraft, the custom mod that transforms Minecraft into a VR experience, uses SteamVR to commincate with your VR hardware. For this reason, SteamVR must be installed (along with Steam client) and configured properly in a way that it is able to detect your headset and controllers.
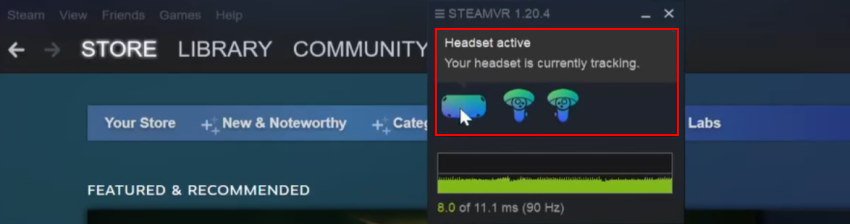
I personally did not have to launch SteamVR separately before starting the game. By establishing an Oculus Air Link connection and then launching Vivecraft from the Minecraft Launcher, it automatically started SteamVR and Minecraft Java Edition after that.
But in case you are having trouble, try launching SteamVR (make sure the headset is detected properly) before launching the game in VR.
2) Make Sure Java is Installed (if Vivecraft Installer Not Launching)
In case you download the Vivecraft installer, but it prompts you for an application to use or throws an error, you likely don’t have the proper Java Runtime Environment installed.
Minecraft Java Edition (with Vivecraft) requires you to have Java 8+ installed. The easiest way to check your current Java version is to open the Windows Command Prompt and type the command “java -version” (see an example below)
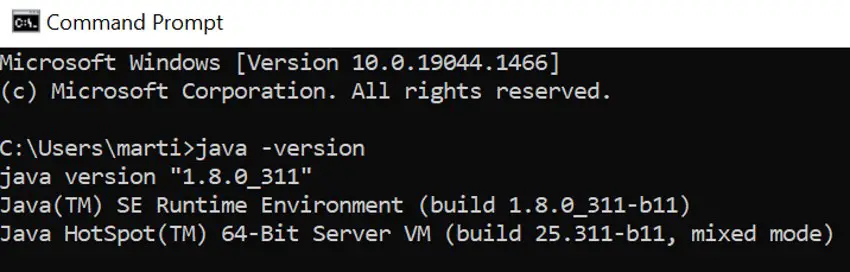
If you get a “java is not recognized as an internal or external command”, go to Java.com and download the latest Java RE. Install it and then try running the Vivecraft installer again.
3) Make Sure You Didn’t Install the Non-VR Version of Vivecraft
When you go to the Vivecraft download page, it gives you the option to download the “VR” and the “non-VR” version of the application. Make sure that you have actually downloaded and installed the VR version of Vivecraft.
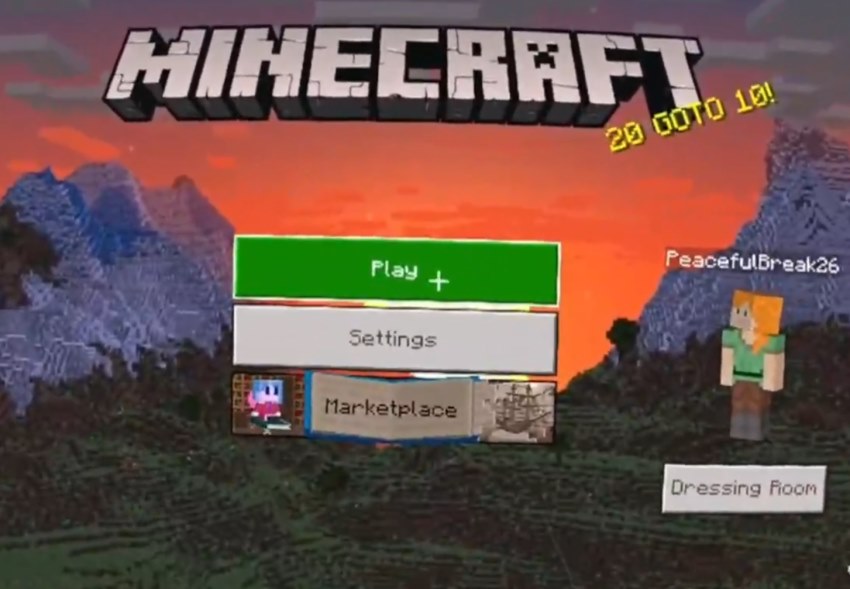
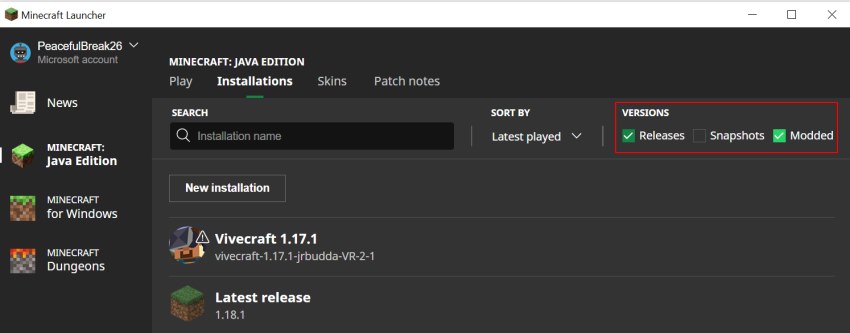
4) Launch “Vivecraft” from Minecraft Launcher
In order to get Minecraft Java Edition to launch in VR, you have to select the “Vivecraft X.XX.X” as the “game” you want to play.
If for some reason you can not see the Vivecraft version listed, navigate to the “Installations” tab and make sure the option to show “Modded” versions is enabled.
5) Configure Vivecraft to Use Dedicated GPU (Laptops)
This section is for people using a PC with dual graphics cards. For example, gaming laptops often have an integrated GPU as well as the more powerful dedicated GPU that is meant for gaming.
If you have a computer with dual GPUs and Minecraft Java Edition only loads up on the desktop but not in the headset, the problem might be that Minecraft is using the integrated GPU which is not suitable for VR gaming.
In order to force Minecraft to use the more powerful dedicated GPU, follow these steps:
- Launch Vivecraft from Minecraft Launcher
- Open Task Manager and navigate to “Details” tab
- Press “j” on your keyboard and locate “javaw.exe” process
- Right-click on the process and select “Open file location“
- Copy the folder location
- Right-click on Desktop and select “Display settings“
- Scroll down and select “Graphics settings“
- Click on “Browse” (in “Graphics performance preference” section)
- Paste the location you copied earlier and select the “javaw.exe” executable
- Select “High performance” and save.
If anything was left unclear, go ahead and watch my step-by-step Youtube video about this below:
Note! Different Vivecraft versions might use different javaw executables. So if you have several versions of Vivecraft installed and/or are installing a new version, you will have to repeat this process.
6) Check Minecraft Logs
Oftentimes if you are having problems launching Minecraft or the game crashes (or something entirely else) it is a good idea to check for additional information from log files.
You can potentially find useful troubleshooting information from the following Minecraft log file destinations:
- %APPDATA%/.minecraft/crash-reports/
- %APPDATA%/.minecraft/logs/latest.log
- %APPDATA%/.minecraft/launcher_log
- %APPDATA%/.minecraft/hs_err_pidXXX.log
You can investigate these logs yourself and google for solutions. If you are having trouble, go ask for help in the Vivecraft Forum and/or Discord.
7) Reinstall Minecraft & Vivecraft
Sometimes after a cascade of changes, updates and various things you have might tried, it would simply be the best idea to start from a blank sheet.
You can remove “Minecraft” by using the Windows “Add or remove programs” utility. After that you can reinstall Minecraft and Vivecraft using my tutorial or any other one you can find.
8) Check Vivecraft FAQ
If you are able to run Minecraft Java Edition properly on your PC flat screen but can not get it working in VR, the issue most likely has something to do with Vivecraft. Go ahead and check Vivecraft FAQ for matching symptoms/errors and potential solutions to your problem.
9) Try Minecraft Bedrock Edition Instead
If you can not get Minecraft Java Edition to work and you are willing to switch, it might be a good idea to also give Minecraft Bedrock Edition a try.
Minecraft Windows (Bedrock) is easier to run (you might get away with a below-average PC) and is different in terms of the technology stack it utilizes. For this reason, it might very well be that you will have more luck getting it to work compared to Java Edition.
“Hmd Not Found (108)” When Launching Minecraft
When you launch Vivecraft from Minecraft launcher and it ends up with a “Render setup failed: Hmd Not Found 108) error” your headset is not properly connected to your PC.
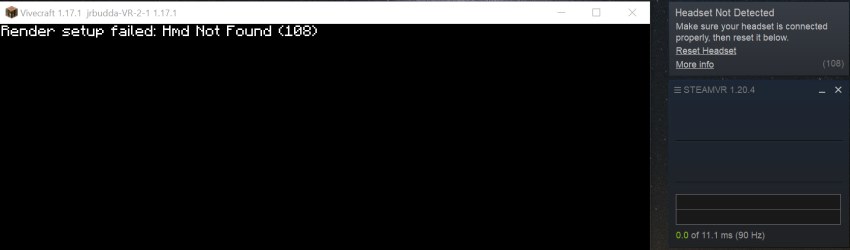
If you receive the “Hmd not found (108)” error:
- Make sure your preferred PCVR method (Oculus Link / Air Link / Virtual Desktop) is configured and working correctly.
- Connect your PC and headset before launching Minecraft
- Make sure SteamVR is installed and able to detect your headset. Sometimes “Reset Headset” is enough for it correctly detect your headset.
Minecraft VR Java Edition Lagging
In case you are facing lagging issues with Minecraft Java Edition using Vivecraft, try the following steps:
- Adjust the value of “draw distance” to 10 and lower (Video Settings)
- Lower the “Render scale” value (VR settings)
- Remove unnecessary shaders and texture packs (Video settings)
- Make sure SteamVR resolution is set it to 100% (or lower)
- Make sure to allocate enough RAM for Vivecraft (2GB is usually enough)
- Close any unnecessary applications and background processes
- Check if there are problems with other SteamVR games
I have previously also created detailed resources about troubleshooting Oculus Link, Air Link, and Virtual Desktop lagging issues (links to articles).
Minecraft VR Bedrock Edition Problems
In this section, I am going to address various issues and solutions that are specific to running Minecraft Windows (Bedrock) edition in virtual reality.
Before you start diving into the problems and troubleshooting steps, make sure you watch my Minecraft Bedrock VR step-by-step installation video (or read my article) and verify that you didn’t miss anything important required to get the game running.
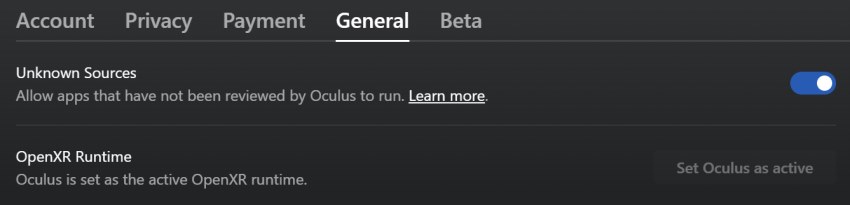
1) Set OpenXR Runtime to Oculus
Open the Oculus PC Software, navigate to “Settings” and open the “General” tab. Make sure that the value of “OpenXR Runtime” is set to Oculus (and not Steam or something else).
2) Allow Unknown Sources
Similar to the last point, navigate to the “General” settings tab and make sure that “Unkown Sources” is enabled.
3) Don’t Use Virtual Desktop
Minecraft Bedrock Edition does not work properly with Virtual Desktop. I tried and it opens in flat screen mode with the control mapping messed up. For this reason, use either wired Oculus Link or Air Link.
Some people have actually claimed that they were able to get Bedrock running with Virtual Desktop by adjusting the installation process and modifying different settings. However, I haven’t found a manual for that nor had the time to dive deeper into this myself.
So currently since you are having problems, it’s probably best to stick with what’s known to work.
4) Change OpenXR Registry Entry from Steam to Oculus
One solution to Minecraft Bedrock VR issues that is passed around in forums and Reddit threads is to check the OpenXR registry entry value in Windows Registry Editor. If it is currently set to Steam, change it to Oculus by following the video below:
This shouldn’t be necessary if you are using a Quest 2 and adjusted the OpenXR value in the Oculus PC software. However, I am not sure about other headsets, so I decided to include this troubleshooting step in the list as well.
5) Try Launching Minecraft from PC and VR
In my video tutorial, I have suggested opening the Minecraft Bedrock VR launcher from your PC and it should automatically pop up the game in your headset. In case you are having problems, try opening your Desktop in VR and also launching the shortcut there.
6) Reinstall Minecraft
Sometimes if you have been stuck for a long time (and possibly made unwanted changes), it is just best to start from a blank sheet. Go ahead and try uninstalling and then complete the installation by following my setup tutorial.
7) Try Minecraft Java Edition instead
If you simply can not get the Bedrock edition of Minecraft to work, I recommend you have a go at the Java Edition instead. Since the two versions run on completely different software stacks, you might just get it running.
Minecraft Missing from Oculus Store
The Minecraft client (originally created for Oculus Rift) that turns regular Minecraft into a proper VR experience was removed from Oculus Store at some point in 2021. The workaround is to create your own Minecraft VR launcher:
- Right-click on your Desktop and select New > Shortcut
- In the shortcut location box, copy and paste minecraft://Mode/?OpenXR=true and select “Next”
- Name the shortcut (e.g Minecraft VR) and click “Finish”
If anything was left unclear, I have also demonstrated the process in the Minecraft Bedrock installation video earlier in the article.
And that is it from me now. I do hope this article was useful and you got your Minecraft issues solved. In case you are still having problems, feel free to drop a comment on my Youtube channel and I’ll try to help if I can.
HARDWARE USED FOR TESTING AND WRITING THE ARTICLES:
* Meta Quest 2 (My “daily driver” headset, which I absolutely love & recommend)
* Lenovo Legion 5 Pro (AMD Ryzen 5 5600H, Nvidia Geforce RTX 3060, 16GB RAM)
* TP-Link Archer C6 (budget dedicated router for Air Link, see my full setup tutorial)
ESSENTIAL QUEST 2 COMFORT ACCESSORIES:
* VR Cover Foam Replacement (one of the easiest & cheapest ways to improve headset comfort)
* BoboVR M2 Head Strap (reduce pressure on your head and improve the overall fit of the headset)